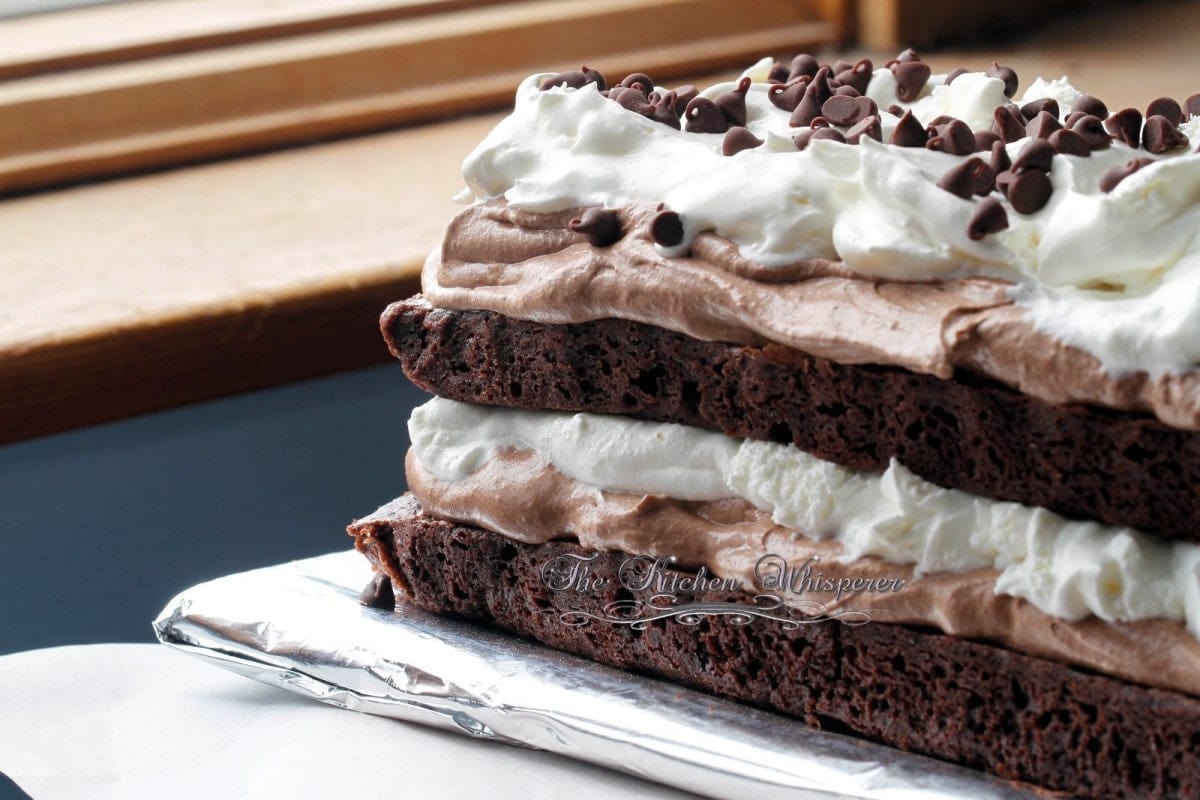
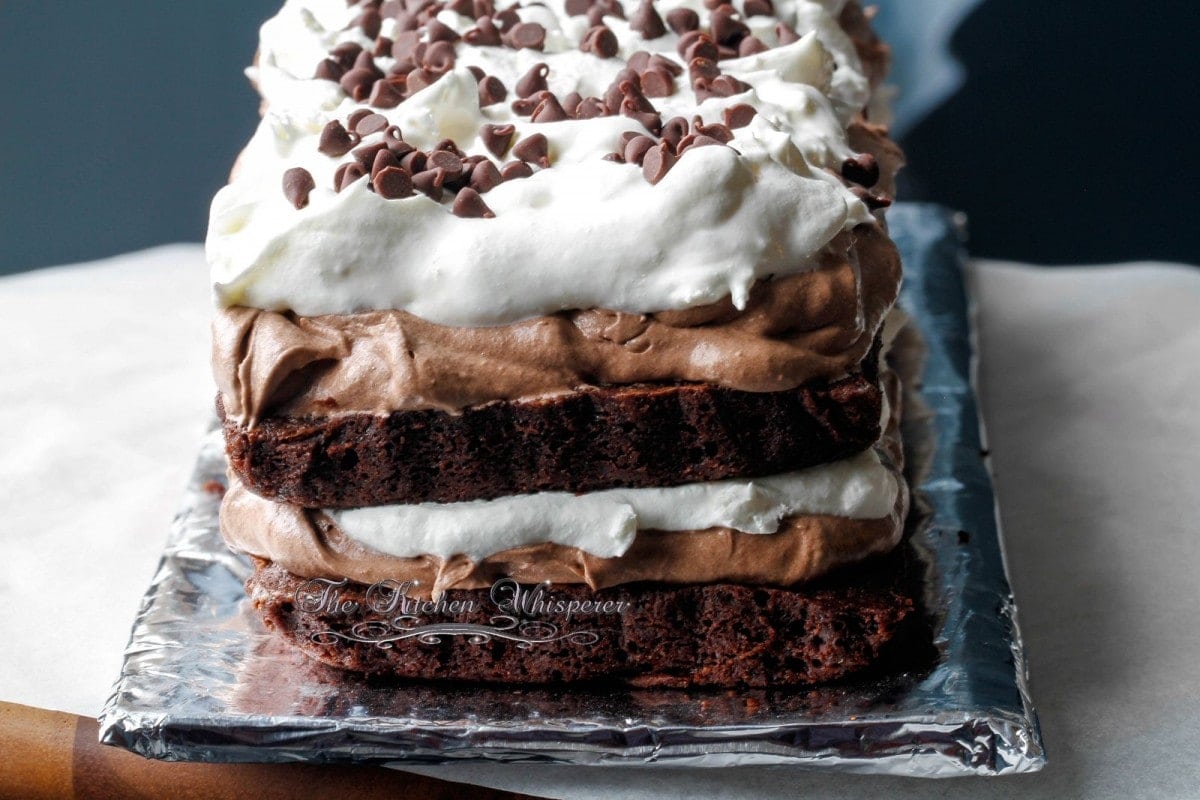
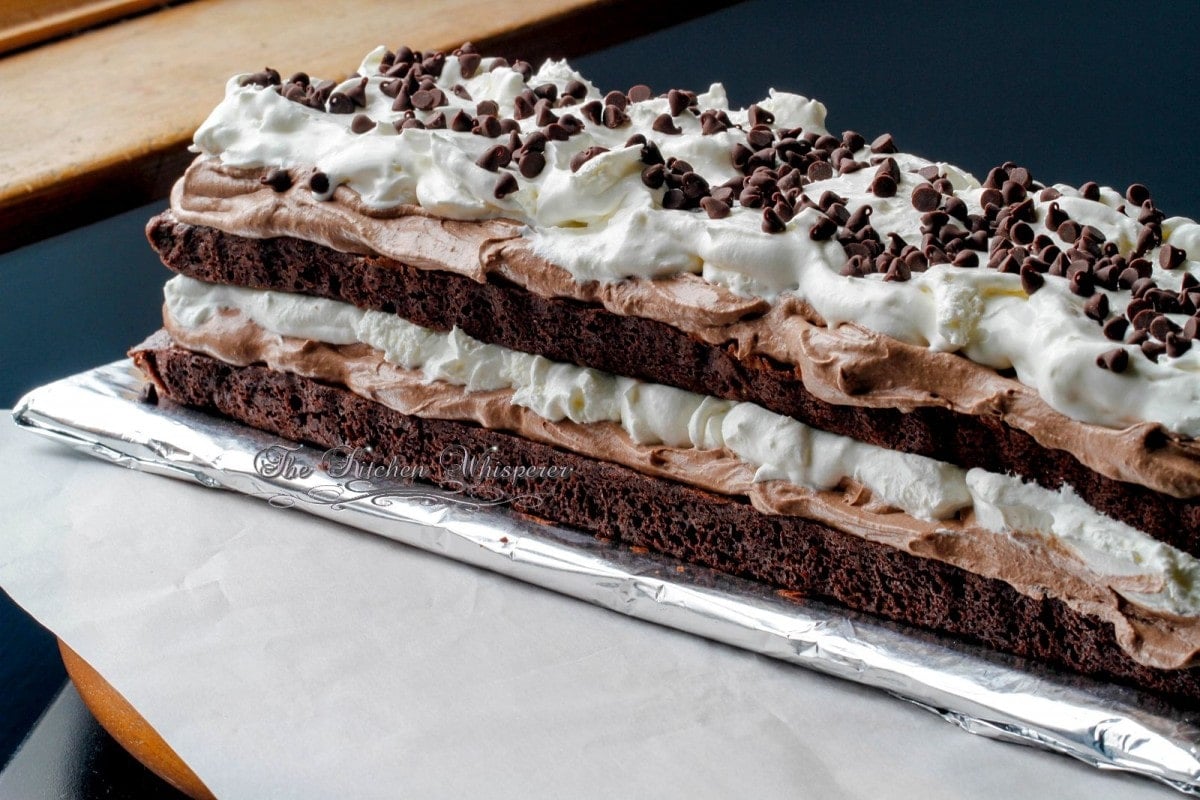
Layers of brownies, decadent chocolate mousse, and whipped cream make this dessert a must-make any time of the year!
With tomorrow being Christmas I thought I’d share one final decadent over-the-top dessert that will so rock your holiday desserts! I made this several weeks ago and this was the first thing to go at a holiday party. I mean even over the meats, cheeses, meatballs, and all the other foods. It’s a pretty dessert and presents so well! It’s decadent but not too rich.
It’s very well balanced in flavors and it’s one of those “a little goes a long way.” desserts I can remember Mr. Fantabulous’ face when he saw me pull this out of the freezer. His eyes were like a child on Christmas morning with a bajillion presents under the tree and they were all for him. Only thing is, this wasn’t just for him.
This dessert just kinda … happened. See I knew they (the folks having the party) loved brownies but I was tired of making standard brownies. Don’t get me wrong, my TKW Signature brownies are out of this world but I didn’t really have the time to decorate them all and come up with a bazillion different flavors and toppings. I’m sorry but I just don’t “do” plain ol’ brownies though some days I think that’s what Mr. Fantabulous wants. For him I oblige (it’s kinda in my vows).
Full confession with this torte. See I already had the chocolate mousse made for this one order I had going out. However, I was daydreaming and ended up making a quadruple batch of it. HUGE mistake.. well okay, there is no such thing ever as too much chocolate mousse but I really messed this one up. I mean seriously… doubling the recipe, sure that can happen. But making 4 batches of it? Only me!
Okay good, so we have mousse and we know we have to make brownies. Now I could have very easily gone with my Mousse Filled Brownie Cups but again, I didn’t want to be bothered with making 900 little cups. So yeah I didn’t need 900 exactly but I needed a good 2-3 dozen. I mean you want the tray to look presentable and filled, right? I needed a show stopper; something that would make people go “WOW, what’s that and can I have some now?” It’s funny as when I get those types of reactions I actually get really, really bashful about it. It’s kind of like I want to wow folks but I don’t want to be the center of attention. I’m weird I suppose.
Now the recipe, if making it all from scratch it is a little time-consuming but trust me, it’s worth it. I’d say the only thing you could use pre-made is use that frozen prepared whipped topping stuff. And maybe you could use a boxed brownie mix but honestly, I haven’t used one of those in God… 25 years maybe? I really have no clue how they bake up. Plus you all know me, I’m a HUGE snob and I like to control what I put in my food. I am not one for preservatives and added crap.
Anyway, back to this dessert. I needed one more element to balance it out color-wise. It was too.. brown. The whipped cream filling just made sense.
Why Stabilized Whipped Cream?
To make this you must make stabilized whipped cream and not just regular whipped cream. It needs to be stabilized so it’ll stand up and not get all watery after a few hours as regular whipped heavy cream does.
But then… more chocolate!
The mini chips were an afterthought. It just needed a garnish. Now if it were me and I was making this again AND I wasn’t pressed for time I would have so made chocolate curls. THAT would have so made this truly pop visually. I’ll have to do a tutorial on how to make chocolate curls. It’s easy and it just looks so very pretty on desserts.
By the time we were ready to leave I had this plated with a few other desserts on the tray with this as the centerpiece. As I mentioned earlier, Mr. Fantabulous was in awe of this thing and I knew he was itching for someone to dig into this as the party.
Fortunately for him, it didn’t take long as this was the first thing DEVOURED. And while I had folks coming up to me asking me a million questions about it I was grinning from ear to ear though I was blushing profusely. My friends all call it an endearing quality about me. They say it shows that I’m genuine and real; sincere and humble. Me I just tell them that I’m just shy to which it’s always, ALWAYS followed with belly laughs from them. LOL
Brownie Mousse Torte
Layers of brownies, decadent chocolate mousse, and whipped cream make this dessert a must-make any time of the year!
Ingredients
Brownies *
- 1 stick unsalted butter, 7 Tablespoons
- 4 ounces unsweetened chocolate
- 1 1/2 cups white sugar
- almost 1/4 teaspoon salt
- 2 teaspoon Chocolate Extract
- 2 large eggs, at room temperature
- 1 cup all purpose flour
- 2 tablespoon Rodelle Gourmet Baking Cocoa Powder, Dutch Processed
- 1 teaspoon baking powder
- 1 teaspoon Espresso Powder
Chocolate Mousse Filling
- 10 ounces bittersweet chocolate, finely chopped
- 6 large eggs, separated
- 1/4 cup white sugar
- 1/2 teaspoon coarse salt
- 2 cups heavy cream
Cream Filling
- 4 teaspoon unflavored gelatin
- 2 tablespoon + 2 teaspoon cold water
- 2 cup whipping cream
- 1/2 cup sifted powdered sugar
- 1 teaspoon vanilla extract
Garnish
- 1/3 cup mini chocolate chips
Instructions
Make the Mousse
- Put the chocolate in a medium heatproof bowl; set aside. Bring a pot with 1” of water to a simmer – you’re going to be creating a double boiler (use a double boiler if you have one).
- In a bowl whisk together the egg yolks, sugar and salt. Set the bowl over the simmering water and whisk until the mixture warm to the touch, about 2 minutes. Do not let your bowl touch the water.
- Transfer the mixture to the bowl of a standing mixer fitted with a whisk attachment; set aside.
- Using that same simmering water, put your chocolate in a bowl and set atop of it and heat until melted. Beat the egg yolk mixture until it is slightly thickened and paler yellow, and forms a ribbon when the whisk is lifted from the bowl ~ 3 minutes. Remove the mixer bowl from the stand. Add the warm melted chocolate and whisk by hand until smooth; set aside. Either with your stand mixer with the whisk attachment or hand mixer with beaters, pour the cream into a bowl and beat until medium peaks form.
- Gently fold the whipped cream into the chocolate mixture until there are no visible streaks of white. Place the mousse into a pastry bag fitted with a star tip or place it in a large plastic baggie leaving room at the one tip to snip off later. Place the bag into the fridge and chill for at least 2 hours.
Make the Brownies
- Preheat oven to 350°F, rack in the middle. Wrap the outside of two 13×4″ rectangular removable bottom torte pans with removable bottoms. If you don’t have these you can use two 8×8” pans with removable bottoms (or line with parchment if they do not have removable bottoms. If you use the larger pans you will need to adjust the baking time.
- In a double boiler, melt the butter and chocolate in a double boiler stirring occasionally. Essentially you want to bring about 1” of water to a simmer then place your bowl that has the butter and chocolate in it over top but NOT touching the water. Remove from heat and allow to cool slightly.
- Stir in the sugar, salt, and Chocolate Extract. With a sturdy mixing spoon, beat the eggs in one at a time until blended. Add the flour, Espresso Powder , baking powder and cocoa and beat until the batter is just smooth. Don’t over mix. Evenly divide the batter between both pans. Bake for 13-17 minutes or until a toothpick inserted in the center comes out almost clean – a few moist crumbs are okay. Set the pans on a cooling rack and allow to cool for at least 20 minutes. After 20 minutes carefully remove the brownies from the pans leaving the removable bottom in place. Cool completely on the rack.
Make the Cream Filling
- Put the mixing bowl and whisk attachment in the fridge for 30 minutes to an hour. You want them ice cold! *See notes
- In a small microwave bowl, combine gelatin and water; let stand until thick ~about 1 minute. Microwave for 20-30 seconds just until the gelatin dissolves and it’s not grainy. Do not allow this to set. Whip the cream with the sugar and vanilla until slightly thick. ~1 minute. While slowly beating, add the gelatin to the cream. Whip at high until stiff. Use immediately or store in the fridge.
Assemble
- Using a long thin spatula carefully remove the bottom part of the pan from one of your brownies and place on a rectangular serving platter. Spread half of the mousse over top of the brownie leaving a 1/4”” space all the way around. Carefully spoon and spread half of the cream filling over top of the mousse. Using a long thin spatula carefully remove the bottom part of the pan from the other brownie and gently place on top of the cream mixture pushing down very slightly. Try to line the edges up. By pushing down you’ll push the filling to the edges.
- Spread the other half of the mousse mixture over top all the way to the edges. Add the remaining cream filling on top and spread to the edges. Garnish with mini chips.
- Chill uncovered for at least 1 hour prior to serving. * You can flash freeze this uncovered until everything is hardened. Then wrap until ready to serve. To serve from frozen state, allow to cool slightly and slice while partially frozen.
Notes
Brownies – yes you can use boxed brownies. You want these a bit more cake-like.
For the Cream Filling ensure that the beaters and bowl used for whipping the cream are cold, in order to stabilize the cream properly. A way to do this is to place them in the freezer for 15 minutes before whipping the cream. – A chilled stainless steel bowl works best for stabilizing whipped cream. – Store desserts with stabilized whipped cream in the refrigerator if they will not be served immediately, as even stabilized whipped cream may collapse if left outside on warmer days.





Leave a Reply