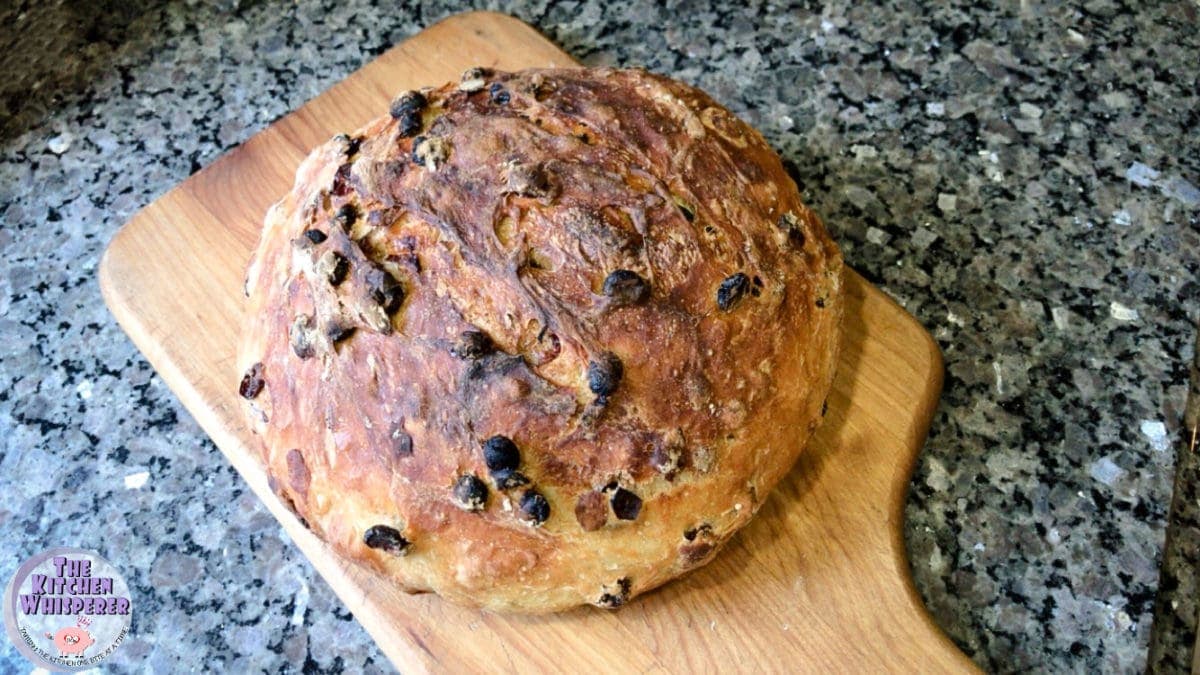
If you can measure, mix and be patient, you can make one of the most delicious no knead bread around! With hints of orange zest, cranberries, raisins and almonds, it’s practically a dessert! So sweet no butter is needed!
Seriously is there anything more perfect than a slice of warm, crusty bread straight from the oven? Well okay, bacon and chocolate but those are foods from the Gods and pretty much sent from heaven above and don’t count (at least not in this post). Bread was the first thing I ever learned how to make actually. I was 3 years old, yes 3 – I have a weirdly odd memory. Like I can remember every single detail about my first birthday from sitting in my high chair to who sat where. Am I like a one-off case or are there some of you like that? I definitely don’t possess an Eidetic (photographic) memory though Mr. Fantabulous begs to differ as I remember EVERYTHING – the good, the bad and the ugly. lol
But yeah back to what I was saying, I was 3 years old and Mom would make homemade bread for the week every Sunday morning. I’d wake up super early and paddle barefoot out to the kitchen in my white and blue flowered nightie dragging my favorite paper-eyed teddy bear. See folks, a MILLION years ago stuffed animals didn’t have “real” eyes on them but rather they were this glued on heavy-duty paper cardboard crap. I’d put my bear in the chair while I crawled up onto the end of the table. She’d have her dough board out (god what I wouldn’t give to have hers), flour would be all over the table (and her) and she would be rolling, kneading, folding and forming like a machine. One day Mom gave me my own rolling pin and had me stand on a chair while she stood behind me showing me how to measure and mix then eventually knead. As she was showing me how to make this she was explaining things to me – why we put ingredients in a certain way, what to do when something isn’t right, how to fix it and most of all to just have fun doing it. I’ll never forget that experience.
Nowadays when I make homemade bread I rarely knead it by hand. The convenience of our stand mixers with dough hooks save us the effort. However, when I’m having a super bad day and need to take my frustrations out or I’m simply just missing Mom, I’ll make dough from scratch all by hand just like she did.
Well years ago someone came up with the notion of No Knead Bread. Throw your ingredients in a bowl, mix by hand until a shaggy type dough is formed and let it proof overnight. I believe it was back in 2006 is when this really because popular thanks to an article published in the NY Times featuring a recipe from Jim Lahey’s cookbook. No Knead bread is virtually fool-proof though you do actually have to do some work to make it.
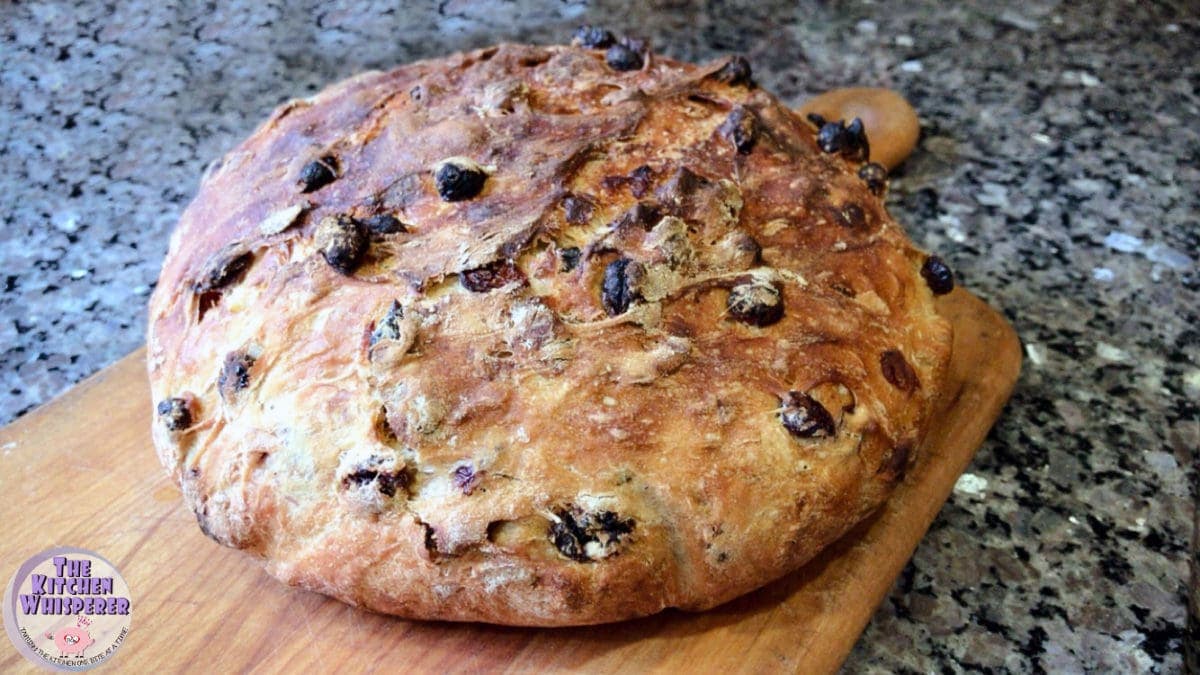
Now normal No Knead Bread is just flour, water, yeast, and salt. Pretty straightforward, right? Well, this bread I wanted to more of a panettone route. Kinda You see I literally had just bought 10 pounds of GINORMOUS oranges at Sam’s club however when we ate one they had a woody taste. No fault of Sam’s club. I just think the grower let them stay on the tree too long to get them as big as possible then picked them. Had I been thinking I wouldn’t have bought those ones and would have gone for smaller ones. But regardless I was stuck with all these steroid-juiced up size oranges and neither of us wanting to eat them. That’s when I decided I’d make something sweet with it.
I was set on making another one of those Orange Cranberry Bundt cakes that we are both obsessed with but when I went to grab my ap flour bucket in the pantry I saw that it was empty. Full disclosure I was super lazy and even though I literally have a 25 pound flour bucket downstairs in my supply room I was having ZERO part of heading all the way down there to fill it. That would have taken effort and I clearly was having no part of putting forth an effort. LOL
Shush – I’m allowed to be lazy damn it. HAHA
The only flours I had in my pantry were bread, cake, whole wheat and rice. Bread it is! LOL And let me tell you what, I’m beyond thrilled I made bread. This bread is sweet and has almost a dessert type quality to it. Now when it comes to homemade bread I’m all about that butter slather HOWEVER I also know to taste things before I load them with stuff. Sorry, I’m jumping ahead of myself here. I guess I need to share how this is made, huh? lol
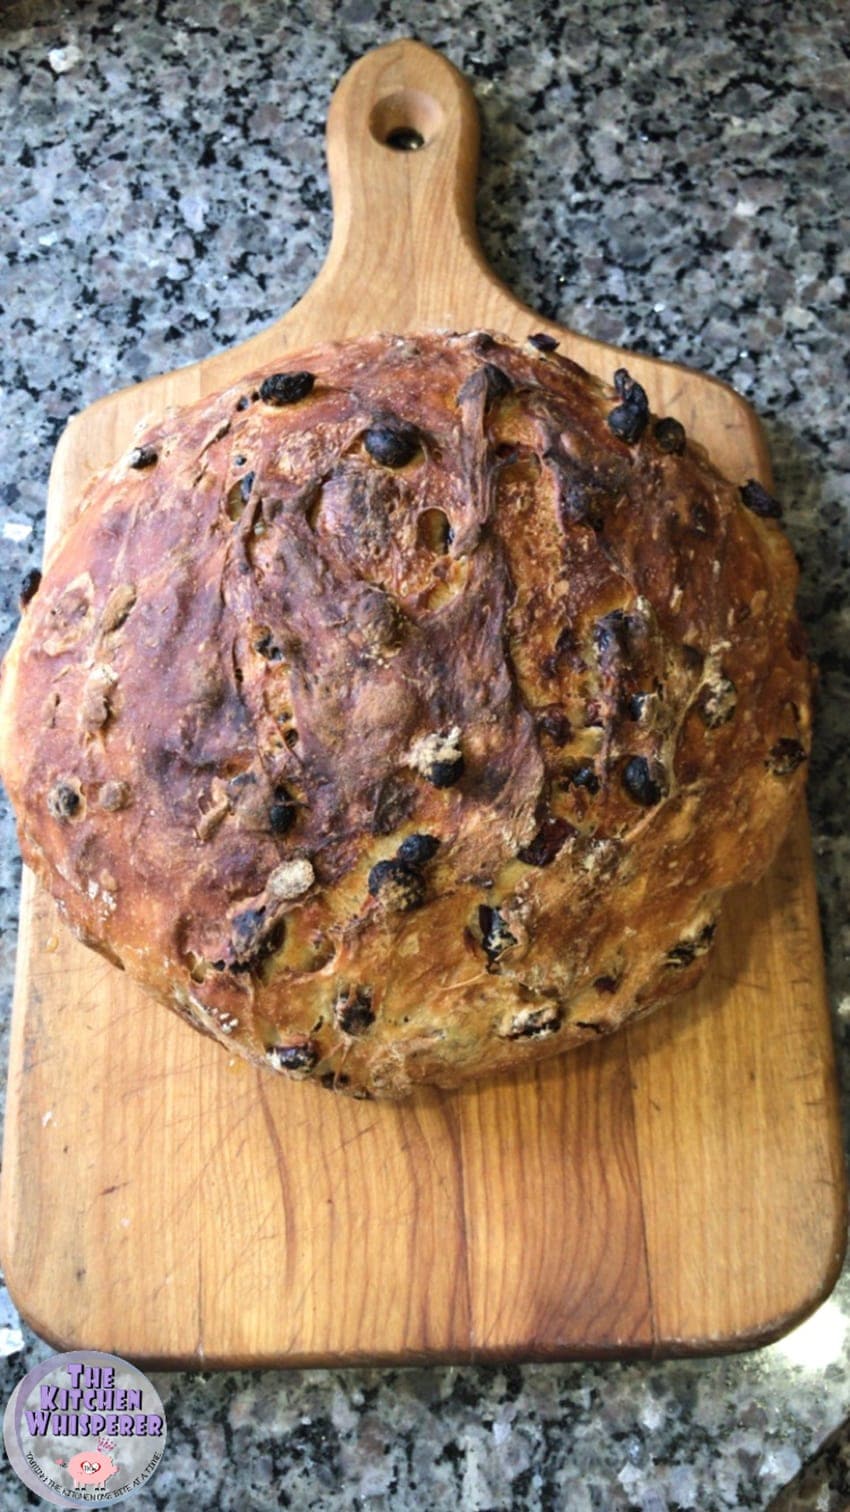
This is the bread that I tell every single person that wants to make homemade bread but is afraid to work with yeast and dough to make. Seriously this bread is SO EASY it almost makes itself! Plus you don’t need any special equipment – just a big bowl, something to stir it with and something to cook it in. Let me discuss the something to cook it in. I recognize not everyone has sponsors or Oprah funds (me included) and can’t afford a dutch oven. I get it. So if you look at the very bottom of the post, after the recipe I give you options on other things you can use to make this in. However I’ll be fully transparent here, I think you get the absolute BEST results from a dutch oven. Definitely, put one on your wish list!
Next what to stir it with – as you’ll see in my recommendations below I actually use a Danish Dough Whisk. Now it’s not like your traditional whisk that you would use to make whipped cream or the like but rather these are used specifically for pastry and dough. What it does is allow the dough to become aerated (just like any whisk) but the clean up is ridiculously easy and the crumb is just a better crumb inside. Again this is another thing that you really should put on your wish list! However if you don’t have one now all you need is a sturdy wooden spoon. I don’t recommend using a spatula as I personally tend to break them and you need something that is solid like a wooden spoon.

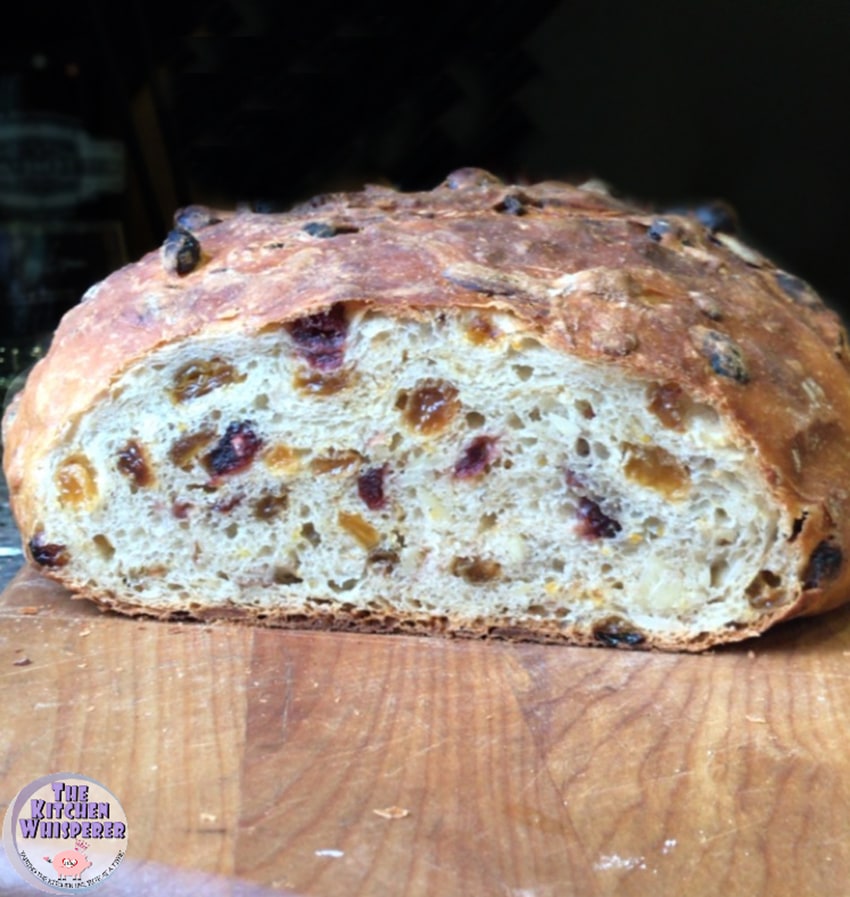
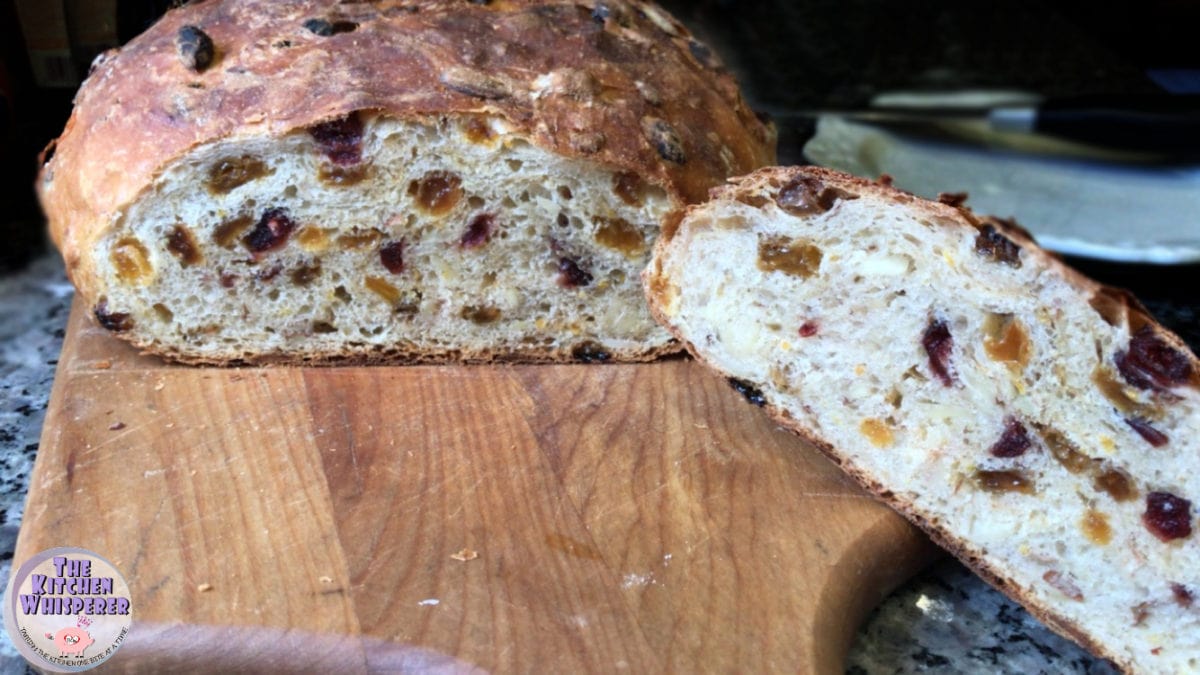
Seriously can we take a second to look at that crumb and ALL of the deliciousness inside of that bread?! Mmmm
Okay, I’m done drooling…kinda. Seriously this bread is freaking AMAZING. I can’t wait for you all to make it! I DEFINITELY want to see pictures of yours! You need to tag me in your photos! So into this dough went the orange zest cranberries, golden raisins (again all I had upstairs) and some almonds. You can totally omit the nuts if you have allergies. Once I mixed it all together, it got a shower cap (yes I use a plastic shower cap to cover my overnight dough). The next morning as I preheated my dutch oven I pulled the dough out with my dough scraper, formed it and let it rise for a bit. The smell alone of the raw dough was incredible! All those wonderful smells of citrus and warmth. It just reminded me of Christmas.
Finally after it was done baking and cooled enough for us to try it I sliced off 2 slices. He’s weird and never eats bread with butter (seriously I told you he’s weird but he’s sexy so that makes up for it! lol) and even though I got the butter ready I tried it without butter. OMG!!! No seriously, OMG! The flavors were absolutely amazing! Sweet, cinnamony and warm. It was absolutely perfect! We’re talking I didn’t even use any butter and ate the warm slice as-is. Seriously, I wish you could see the dorky smile I have on my face now as I talk about this bread as this is truly a WINNER and hands down one of my top 5 FAVORITE breads. It’s simply remarkable!
Equipment used:
6 quart dutch oven with tight lid – I prefer to use either cast iron or enameled cast iron for these types of breads.
Large mixing bowl – You need to give this dough room to proof and rise (and it will). I use the large size for bread. Plus this is an AWESOME set that every kitchen needs!
Danish Dough Whisk – I actually prefer using these when I make my no knead breads as they are easier to clean and they help aerate the dough. If you don’t have one (if you make bread by hand, definitely get one eventually) you can totally use a sturdy wooden spoon.
Plastic Disposable Shower Cap – Yes for real! I use these to cover my dough bowls at night. They snap around the bowl and I don’t have to battle with cling wrap!
Dough Scraper – seriously these things are a MUST HAVE when you make dough!
Most Awesomest No Knead Orange Cranberry-Raisin Bread
Find more fantabulous recipes, tips and tricks at www.thekitchenwhisperer.net. Also, join our TKW Family on Facebook, Twitter, Pinterest and Instagram
- Yield: 1 loaf
Ingredients
- 3 cups bread flour (can use AP if that’s all you have)
- 1/2 teaspoon instant yeast (I HIGHLY recommend Red Star Yeast Platinum!)
- 1 1/2 – 1 3/4 cups warm water (it depends honestly on how humid your kitchen is)
- 1/4 cup white sugar
- 1 teaspoon cinnamon
- 1/2 teaspoon salt
- 1/2 cup dried cranberries
- 1/2 cup golden raisins
- 2 tablespoon orange zest
- 1 teaspoon fiori di scilia or orange extract
- 3/4 cup sliced almonds (or slivers)
Instructions
- In large bowl (You need to make sure the bowl is at least 2 times the size as this will easily double in volume) add the flour, yeast, sugar, cinnamon, orange zest, cranberries, dried raisins, almonds, fiori di scilia, and warm water. Using a wooden spoon, mix until a shaggy dough forms. Add in the salt and mix again.
- Mix it until it’s combined and forms a ‘shaggy’ dough. Just make sure that all the flour is incorporated. It will not be a smooth dough – that’s how it’s supposed to be.
- Cover with plastic wrap and set in a warm place overnight for at least 12 hours but no more than 24.
- When you’re ready to bake, put the rack in the middle and preheat to 450F.
- When the oven reaches temp, put your dutch oven pot (cast iron or heavy ceramic {check to see that your ceramic can handle 450F temp first!}) in the oven WITH THE LID on. Let it heat up for 30 minutes.
- While that’s heating up, use a dough scraper and scrape your dough onto a heavily floured surface. Shape into a ball, tucking the sides under. It will be sticky but that’s good.
- Lightly spray parchment paper and place the shaped dough on it. Cover lightly with plastic until the 30 minutes is up.
- Remove the pot from the oven and plop the parchment paper and dough ball down in. Replace the lid and bake for 25 minutes. No peaking! Remove the lid and bake for another 10-15 minutes or until the crust is golden brown and has a hollow sound when tapped.
- Remove from the oven and using tongs remove the bread and cool on cooling rack. Cool completely before slicing.
Notes
Note 1: If you’re not comfortable with shaping the dough, when you remove the pot from the oven after 30 minutes you can carefully just pour the dough into the pot. It won’t be a perfectly round bread loaf but that’s okay – it’s just rustic. If you do pour it in, just jostle the pan around to kind of even out the dough before putting the lid on. But practice with shaping the dough. You can’t screw it up.
Note 2: Don’t have a dutch oven or clay pot? See the end of the post for tips
Don’t have a dutch oven or clay pot? Never fear! Grab your cast iron pan instead! If you don’t have a cast iron pan, you can use the following: Clay pots with lids, Pizza stone with a bowl to cover the bread, insert from a crockpot, pyrex baking dish with a lid, stainless steel pot with a lid, baking dish covered with aluminum foil, old cast iron dutch oven. Essentially ANYTHING that can withstand the oven heat and time!
- Take a 12″ round cast iron pan (with preferably a 2-3″ side wall) and place that into your 450F degree oven (just like the directions on the site). This pan will go on the middle rack.
- WHILE you are heating that up, place a metal pan on the lowest shelf/rung in the oven at the same time. I just use an old cake pan that has seen better days.
- When you remove the VERY HOT skillet from the oven and put your dough in it (have the dough resting on parchment paper so the bottom doesn’t get that ‘black’ color from the pan).
- AND as soon as you put it in the oven put about 3 cups of ice cubes in the hot baking pan. DO THIS FAST as you want to trap the steam in the oven!
- This will create steam (just like a dutch oven).
- After 30-35 minutes check the bread. It should be done but if it’s not cook for 10-15 min more. If at 30 minutes it’s getting dark but not done (will sound hollow when tapped), just tent some foil over top for about 10 minutes.
- Cool as normal.





Leave a Reply