Save that liquid from your chickpeas to make a delicious vegan meringue!
While trying to live a healthier lifestyle (and be frugal at the same time), I like to find ways to re-purpose stuff we would normally discard. While I’m not a vegan (sorry but I need real bacon in my life) I do love some vegan meals. But let’s be real here, I simply just love food in general. Then again you do too as well, you’re reading this *smile*. One of things, when running a food blog, is you need to educate yourself beyond the foods that just you like. It’s because of you all that I now LOVE Brussels Sprouts, eat roasted tomatoes and require caramelized onions on my burger. So thank you!
One of my most popular recipes is my Chunky Portabella Veggie burger which, is vegetarian, is not vegan. I’ve updated the recipe throughout the years to offer suggestions to veganize it. I’ll often work with many of you offline to also veganize some of my other recipes. I can remember a conversation I had with my one girlfriend that eats a total plant-based lifestyle and we were talking about all of the delicious things she makes (which meant ideas I can share with you). As we were chatting she brought out some cookies, crispy little meringue cookies. As I took a bite I was pleasantly surprised by the flavor. It had a familiar taste that I couldn’t quite place, which if you know me, you know this will drive me nuts. I just have to figure stuff out. It’s the engineer in me!
My friend found this quite amusing and “refused” to tell me what was in it. She said “You’re the chef, I’m going to let you mull over this. I’ll give you a week and if you can’t figure it out then I’ll tell you.” Such a brat! “Stump the chef” is a game my friends like to play with me – cruel jerks. lol
The next day I could not shake get that cookie off of my mind. To help me my friend gave me a few to take home to try. Throughout the day she’d send me a text “I know something you don’t know. Neener neener neener” lol It wasn’t until maybe the 3rd day when I was eating my lunch did I finally pinpoint the taste – CHICKPEAS! But wait, you can’t grind chickpeas to make meringue cookies. Regular meringue cookies are egg whites, sugar, vanilla and maybe cream of tartar. Ground chickpeas would weigh it down. So then I started thinking about the liquid. It’s watery but it’s not. It’s kind of slimy like egg whites to maybe???
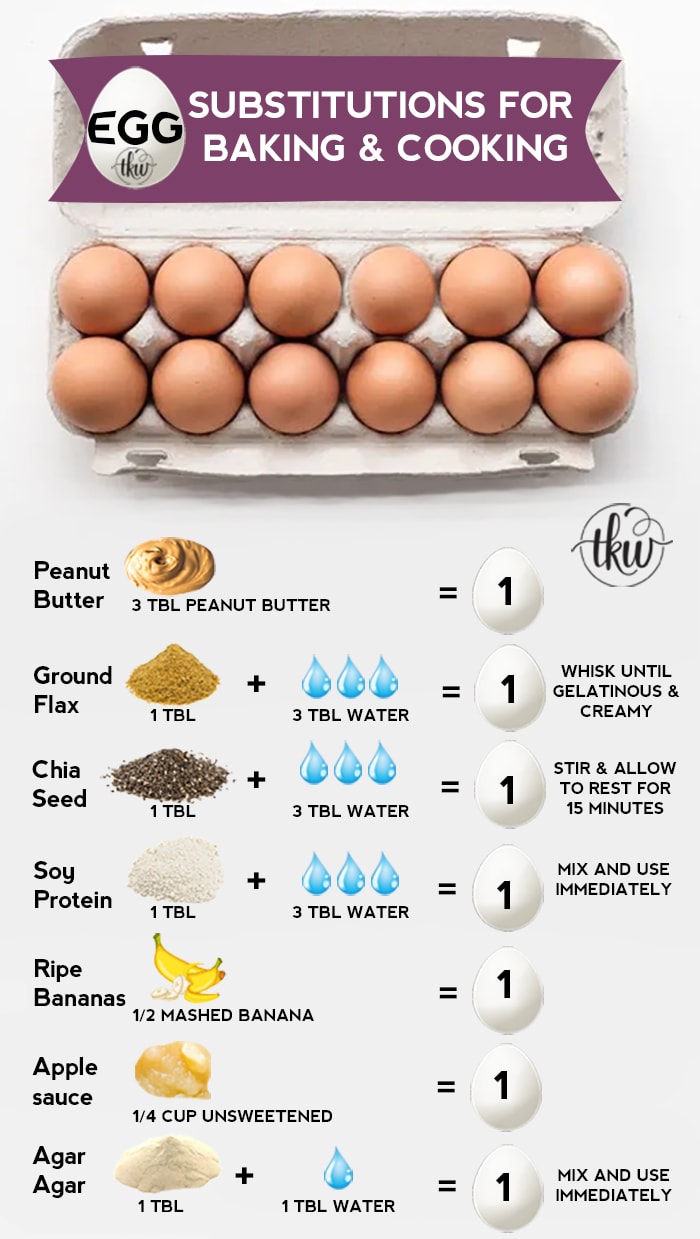
So I did some research. I found out that the liquid from beans is actually called Aquafaba. What I come to find out is that it can be used to replace egg whites in many sweet and savory dishes. Since beans are starchy and have protein, they produce this liquid byproduct that is a mix of starches, proteins and other soluble plant solids. That, when the beans are cooked down help produce this foaming, gelatinous type thickening liquid. Gross but super cool! What I found out is that 3 tablespoon of the aquafaba is equal to one whole egg and 2 tablespoon of the aquafaba is equal to 1 egg white. Since cans of chickpeas are about 15 ounces that yield about 1/2-3/4 cup of liquid that’s about 8-12 tablespoon or 4-6 egg whites.
I pulled out my go-to meringue recipe and tweaked it slightly to adjust for liquid but I have to tell you guys, it works really well! You can sweeten with extract and they pretty much taste like “regular” meringue cookies.
Later that day I took a few pics and sent it to my friend with a note saying “CHALLENGE WON!”. She called me and said “How in the world did you figure it out???” I told her I broke into her house and stole her recipe. She laughed and said I was a dork. I then walked her through my whole “thinking” process. She said “Dear God Lor your brain scares me!”
PrintVegan Meringue – Aquafaba
Save that liquid from your chickpeas to make a delicious vegan meringue!
- Total Time: 3 hours
- Yield: ~ 3 dozen
Ingredients
- 3/4 cup Aquafaba (room temperature)
- 2/3 cup granulated sugar
- 1–2 teaspoon vanilla extract
- 1/8 txp cream of tartar
- 1/8 teaspoon salt
Instructions
- Preheat oven to 250 F. Line a baking sheet with parchment.
- In a bowl add the aquafaba, salt and cream of tartar. Using an electric mixer beat until soft peaks form.
- Gradually add in the sugar one tablespoon at a time beating until glossy stiff peaks form. Add in the vanilla extract and beat until well incorporated.
- Pipe into small circles about 1″ in diameter. Bake for about 90-120 minutes or until firm and they are no longer glossy – rotate the pans half way through.
- Turn the oven off, leave the door closed and allow to sit in the oven for one more hour to dry completely.
- Store in airtight container




Leave a Reply